I don’t know who needs this post, but it has been in my mind for about three weeks now and won’t let me be, so here goes. I have eaten gluten free for quite a while now. I won’t bore you with all of the details, but quite a few of my lifelong digestive symptoms disappeared or were greatly reduced when I started this practice, so I’m a much happier camper at this point. My book, Cooking Pure and Simple was already well under way when I began this gluten free journey, so it’s not specifically a gluten free cookbook, but many of the recipes can be made so simply by substituting a gluten free flour where the recipes call for all-purpose flour. Most of the recipes that appear on this blog are in my book, but this one is not so it’s a freebie. I’m including it on the blog simply because I love it.
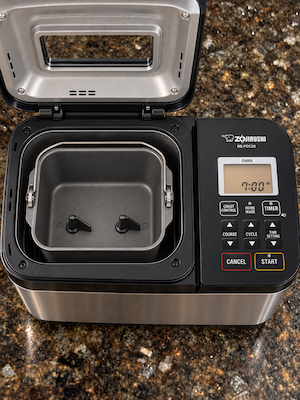
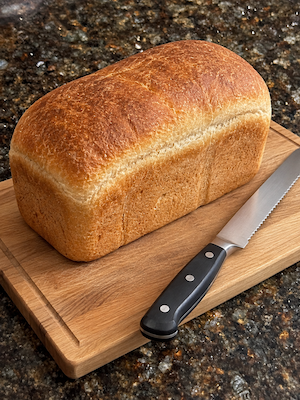
One of the things that I found out when I started eating gluten free was that commercial gluten free bread is expensive! So I bought a bread machine with a gluten free cycle included. (Mine is a Zojurushi BB-PCD20), and no, Zojurushi is not paying me anything to include their name here. It’s just what I bought and I love it. There are other options available though. This machine has paid for itself many times over just in what we have saved by not buying the commercial bread and the bread is delicious.
Please do what your home economics teacher told you and read the whole recipe before you start because I’m going to include some notes at the end about things I’ve learned the hard way, so you don’t have to.
Gluten Free Bread in Your Bread Machine
| Metric | Standard | Ingredient |
| 360 ml | 1 ½ cups | Milk |
| 3 | Large eggs | |
| 15 ml | 1 tablespoon | Apple cider vinegar |
| 45 ml | 3 tablespoons | oil |
| 45 g | 3 tablespoons | sugar |
| 4 g | 1 heaping teaspoon | Psyllium husk |
| 554 g | 2 ¾ cups | All-purpose gluten free flour |
| 15 g | 1 tablespoon | Xanthan gum |
| 7.5 g | 1 ½ teaspoon | salt |
| 15 g | 1 tablespoon | Active dry yeast |
Instructions
1. Beat the eggs in a small bowl.
2. Add the ingredients to the pan in the order listed.
3. Choose the gluten free setting if your machine has one.
Use the Quick, Rapid or Basic setting if you don’t have a
gluten free option.
My notes:
1. Use a kitchen scale and weigh your ingredients if at all possible using the metric measurements. Using standard measuring cups can work, but you will be much more accurate if you use a scale and that really matters with baked goods. Sometimes I “fudge” a little bit and use my measuring spoons for the smaller ingredients, but I always weigh the flour.
2. A few ingredient notes: I use rice milk instead of regular cow’s milk, olive oil because we really like the taste, and raw sugar again because we like the taste.
3. The psyllium husk that I use just says Fiber Powder on it. It’s a store brand available in the vitamin and nutrition section of our grocery store. Check the ingredients and make sure that the only thing listed is psyllium husk. DO NOT leave this out! It is what will make the difference between a light tasty loaf of bread and a crumbly mess.
4. My favorite brand of gluten free flour is King Arthur all-purpose gluten free flour. I’ve tried others and this one comes out perfect every single time.
Oh and just so you know; I actually figured the cost on this loaf of bread and it’s less than half what you would pay for a loaf of commercial gluten free bread, so, yes it is worth it. Just pour your ingredients into the machine and it does all of the work and saves you lots of money.
Hope this is a help to someone,
Suzie
Get your own copy of Cooking Pure and Simple as a print book or an ebook